How to Build a Sales Process Map in 4 Steps (& Make Sales Forecasts a Breeze)
Contents
When building a high performing sales team, one of the critically important pieces of sales infrastructure is a well-defined sales process and visual sales process map.
Sales process can be defined as the key selling steps and stages of the sales cycle and can be expanded to include top-of-funnel activities on the front end and client-retention strategies on the back end.
Ultimately, a sales process map outlines how your organization interacts with your buyer from attraction, engagement, selling, closing, and retaining.
Many sales leaders first develop a sales process map when they implement a CRM to maximize reporting capability. However, if the stages are not defined, sales reps may incorrectly report revenue in the wrong stage of the process.
Keep in mind, process should be kept separate from methodology.
Process is steps and stages… a framework. Methodology is how you execute each step and may include scripting, questioning framework, presentation / demo details, and detailed how-to’s on proposing and closing.
Process is the what. Methodology is the how.
You need both, of course, but in this article, we’re focusing on process. Keep reading to learn a simple, 4-step process for building a sales process map that takes the guesswork out of sales forecasting.
Building a Sales Process Map
What information do you need to include? The most effective sales process maps include 4 pieces of information:
- Name of each stage
- Definition of what allows a deal to be in each stage
- Details of what happens in this stage
- Checklist of what must be accomplished for the deal to move to the next stage
RELATED: Sales Process Mapping: What It Is and How to Do It
Now, let’s look at the 4 steps you’ll take to build an effective sales process map.
Step 1: Define the starting point
The first step in building your sales process map is to decide where you’d like to start the process map, be it top of funnel (which may be considered more of a marketing function) or at the first sales interaction, be it prospecting or qualification on an inbound.
Step 2: Name your stages
Second, name your stages. Here is an example of an expanded sales process map’s stages:
- Brand awareness
- Brand engagement
- Marketing qualified lead
- Sales interaction
- Sales qualified lead
- Discovery / needs analysis / requirements gathering
- Demo / solution presentation
- Proposal / estimate / quote
- Verbal agreement
- Contract signed
- Implementation
- Go live / start
- New client
- Existing client
Step 3: Define each stage
Next, define each stage and clearly indicate how a deal moves into this stage, what happens during the stage, and what needs to happen for it to move out of this stage.
Here’s what you need to think about for each stage of the sales process map.
Brand Awareness
Owned by Marketing, this involves strategic placement of the brand in front of the target audience through multiple channels and methods, not limited to traditional or digital advertising, SEO, mailers, trade shows, and email marketing.
Brand Engagement
Once a buyer interacts with the brand, it’s considered engagement. This might be a buyer’s activity on a website, like submitting a contact us form, downloading white papers / case studies / brochures, or communicating with a chat bot.
RELATED: [Case Study] How I Use Mailshake to Save a Ton of Time on Link Building Campaigns
Other brand engagement examples include participating in a marketing-promoted informational webinar, responding to a marketing email or mailer, or asking for more information.
Marketing Qualified Lead
Engagement turns into a marketing qualified lead once minimum qualification requirements are met.
This is different for every company. Perhaps you want to confirm the buyer meets your geographic and demographic requirements, like location, size of company, and industry.
Once the lead is deemed qualified by marketing, it is passed to the sales team.
Sales Interaction
The first interaction the sales team has with an MQL should be to further qualify or disqualify the buyer. This may also be the first stage of your sales process map if you’re choosing to exclude marketing and begin with the sales team’s process.
The sales team should be trained to know the psychographics that make up an ideal client. Most common, sales teams should learn what pain or problem the buyer is looking to solve, confirm they have budget, understand the timeline, and the decision process.
This stage might be broken into sub-tiers that outline all sub-stages of outbound prospecting, including using social platforms like LinkedIn, outbound email prospecting, networking, telemarketing, in-person drops, or cold calls.
To move from sales interaction to the next stage, sales-qualified lead, the minimum requirements must be met.
Sales Qualified Lead
All deals in this stage have been deemed qualified but are waiting for further discovery to be scheduled and conducted.
Discovery / Needs Analysis / Requirements Gathering
Once the discovery meeting is scheduled, the deal shows active in this stage.
Depending on the complexity of your sale, a deal may stay in this category for a while. It’s not uncommon for multiple discovery meetings to be needed in order to gather all requirements to set up the deal for success in the demo / solution presentation stage.
Once all requirements are gathered and the demo is scheduled, the deal can move to the next stage.
Demo / Solution Presentation
Many deals are given a presentation prematurely. Set clear requirements on when a deal receives a demo or solution presentation.
RELATED: How to Nail a Sales Presentation
This stage requires preparation by the sales engineer or technical lead. The rep should engage in pre-demo strategy planning to ensure the sales engineer is completely in the know on what to demo or present, avoiding a lengthy canned demo that loses the buyer’s interest.
Proposal / Estimate
Once the solution has been presented or demoed, a price proposal or estimate needs to be created.
Clearly outline the steps for proposal creation here. Many teams rely on an estimator or a technical lead to produce estimates or quotes. The deal remains in this stage until the proposal is presented to the buyer and a verbal agreement is received or the deal is confirmed lost.
Verbal Agreement
After the proposal delivery, a verbal agreement should be secured with a clear outline and understanding of the contract process. Most deals sit in this stage for a short period of time, as a verbal agreement leads directly into the contract-signed stage.
Contract Signed
A deal cannot progress into this stage until the contract is signed. This is a placeholder stage between verbal agreement and implementation, indicating the contract is signed and the deal is transitioning into implementation.
Implementation
Some companies have short implementation periods and some have lengthy, extensive implementation processes.
Outline the subcategories of implementation in this stage, including what is required at each step — like information gathering, system testing, training, beta, side by sides, and audits.
The deal stays in this stage until it is confirmed “live” on the new product or service.
Go Live
Once a deal is confirmed live on your product or service, the deal is moved to this stage. Typically, this stage triggers a commission payout or quota relief, unless that takes place when the new deal is signed or submitted for implementation.
New Client
The new client stage is typically a probationary period where a new client is serviced by a special operations team or stays with the implementation team for a short period of time until they are confirmed up and running smoothly on the new product or service and don’t need any additional implementation type support.
A new client moves out of this stage once they “graduate” from their implementation or new client team.
Existing Client
Once a client is on your product or service for a determined period of time, they are no longer considered a new client and are now considered an existing client.
This stage should have multiple subcategories on how the client is supported for retention, up-sell, and referral solicitation practices.
Step 4: Visualize the flow
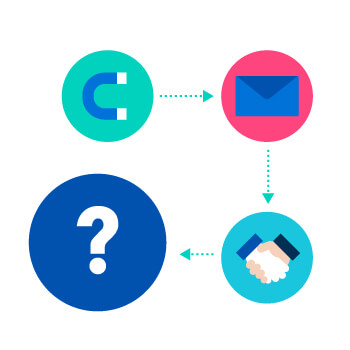
The last step in building your sales process map is to create an easy-to-follow visual.
RELATED: A 4-Step Sales Process to Streamline Your Deal Flow
Once the sales process map has been made into a graphic, you need to ensure every team member understands the flow, the CRM mirrors it, and each team member is managed to it, so you maintain continuity amongst business practices.
Why You Need a Sales Process Map
A sales process map unites everyone who is part of the client acquisition process. It helps teams gain clarity on how each deal progresses, and it defines how revenue is tracked.
To take it one step further, high-performing sales departments use the conversion-tracking information (how many deals covert to the next stage)
- To build reverse funnels that back into the annual quota number
- To understand how many actions need to take place to get enough qualified opportunities in the top of funnel to convert to closed business
But it all starts with the 4 steps I’ve laid out in this article. So what are you waiting for? If you haven’t already, map out your sales process today.
CLICK HERE download sample sales process visuals (opt-in required).

